Google Sheets

Google Sheet, also known as Google sheets, is an application that allows users to create and edit spreadsheets for free similar to Microsoft Excel. You can save customer information to Google Sheet after submitting forms. To integrate Google Sheet into a form, follow these steps:

Step 1: Access Google Cloud to generate Client ID and Client Secret keys.

Add new project
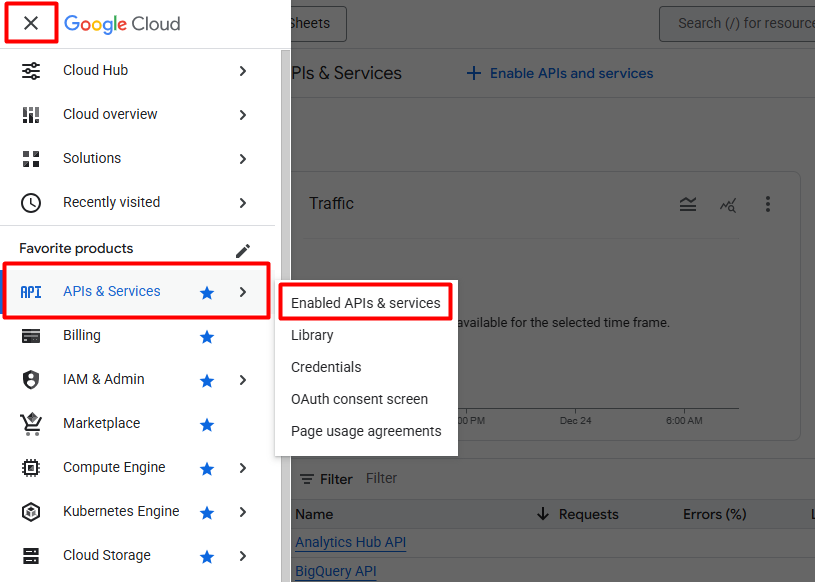
  • Click Menu Google Cloud -> APIs & Services -> Enabled APIs & services
Enabled APIs & services
  • Click ENABLE APIS AND SERVICES
Click ENABLE APIS AND SERVICES
  • Search for Google Sheets API and proceed to enable
Search Google Sheets API
  • Enable Google Sheets API
Enable Google Sheets API
  • Click CREATE CREDENTIALS to generate credentials
Create Credentials
  • Create credentials then press Done
Credentials Type
  • Select OAuth consent screen to set up the authentication screen
Select OAuth consent screen
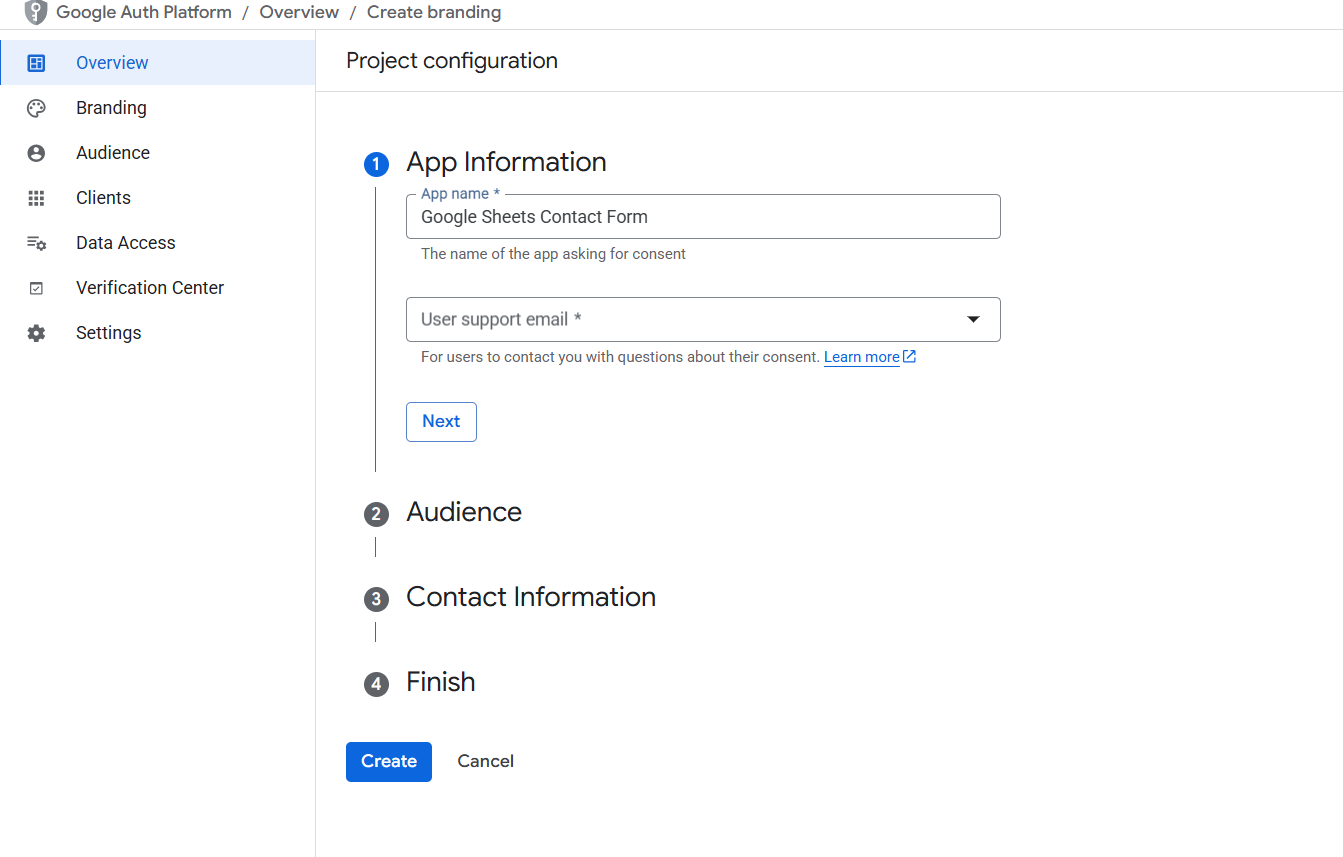
  • Select Audience.
Select Audience
  • Enter Contact Information
Contact Information
  • Select menu Audience -> Publish app
Publish app

Select menu Overview -> Create OAuth client

Create OAuth client
  • Create OAuth client ID
Create OAuth client ID
  • Note: Authorized redirect URIs you need to copy at Dashboard -> WP Form Builder -> Settings -> Integrations -> Google Sheets -> Authorized Redirect URIs
  • Press the Create button to receive the security keys. Copy the Client ID and Client Secret keys and paste them into Dashboard -> WP Form Builder -> Settings -> Integrations -> Google Sheets
Client ID & Client Secret

Step 2: Perform authentication to allow the Google Sheets app to access and edit the document. 

Authenticate Google Sheets
  • Click “Authenticate Google Sheets” to proceed with authentication.
  • If you encounter a warning, click Advanced then choose the option to continue with the warning
App warning
  • Click continue to continue validating the application. After successful authentication, google will navigate to your website and display a successful authentication message.
Authentication successful
  • Click continue to continue validating the application. After successful authentication, google will navigate to your website and display a successful authentication message.

Step 3: Create a form with the necessary information

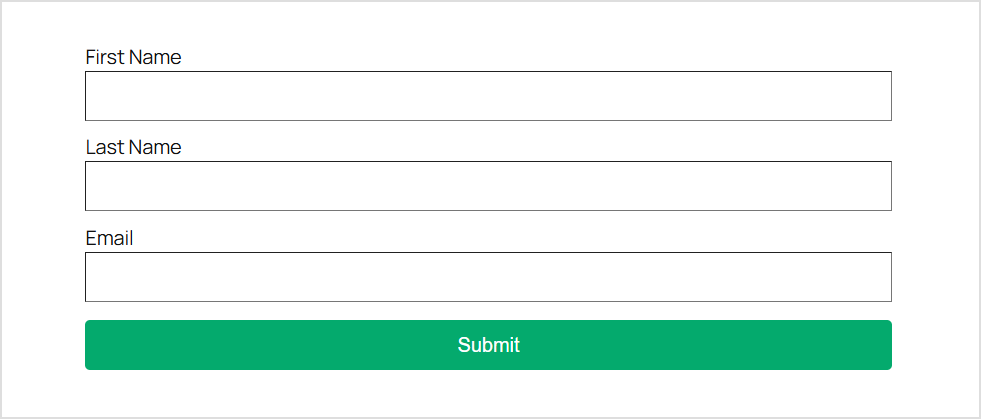
Create Forms

Step 3: Select the Actions After Submit section, add Google Sheets to the actions select box.

Add Google Sheets to Actions After Submit

Step 4: Select the Google Sheets section and perform the integration

Google Sheets Section
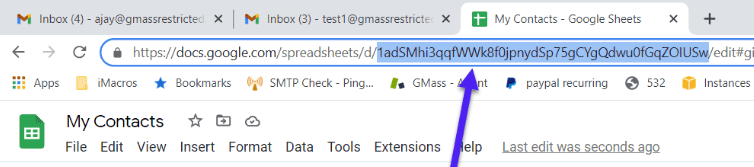
  • Sheet ID: You need to get the ID of the Sheets file displayed on the browser.
Google Sheets ID
  • Tab Name:Tab name of google sheet corresponding to ID.
Google Sheets Tab Name

Step 5: Perform mapping of fields to corresponding rows.

Mapping

Step 6: Complete mapping fields and test form operation.